Let’s say you are running a game like The Amazing Race, where there are multiple checkpoints that players have to physically reach before they can complete the game. This application is a way to track if a player has reached a checkpoint or not.
A little bit about 2FA
A typical two-factor authentication flow involves only one party. They will enter their mobile phone number to receive an SMS with the verification code, then enter said code into the user interface to authenticate their identity. Easy-peasy-lemon-squeezy.
Things become a bit more interesting if you want to make this a two-party affair. A checkpoint administrator will have a list of all players and their corresponding phone numbers. When players reach the checkpoint, the administrator will trigger a verification code that is sent to the player’s phone.
The player will then enter that verification code via an online web form or respond via SMS to confirm their presence at the checkpoint. In theory, because the administrator has no way to access the verification code, they will be unable to verify players who are not present at the checkpoint.
Before you raise the multitude of ways players can still collude with administrators, let me assure you that I am aware of them, but this is an MVP and we will revisit fraud prevention (and a myriad of other features) in future releases. Maybe.
Libraries used
- Nexmo’s Verify API
- Nexmo’s Messages API
- Koa.js (and relevant middleware)
- Nunjucks
- lowdb
Nexmo’s Verify API is usually used for two-factor authentication, or for passwordless authentication. Rather than write a secure OTP generation functionality myself, I chose to use this for my verification codes instead.
Koa.js is the framework behind the application, for serving, routing, handling of API requests and responses etc. As the core Koa.js framework is rather barebones, various middlewares have to be added where needed.
Nunjucks is the templating engine for rendering data on the frontend, while lowdb is a very simple JSON database, great for prototypes like this application. All the database related functions can be easily swapped out for another more “serious” database.
A basic Koa.js application on Glitch
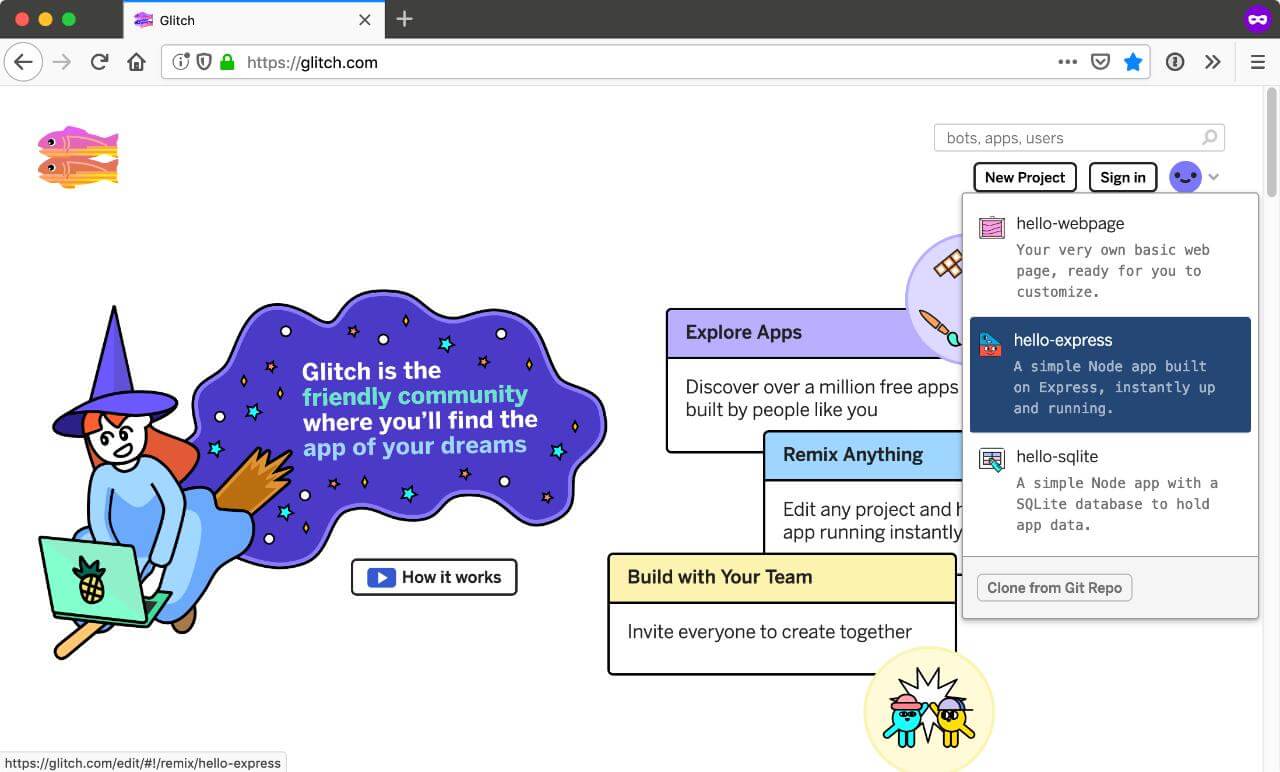
If you’re already using Glitch, please skip all this. For people who have yet to discover the amazing platform that is Glitch, when you first land, you can choose what type of project you want to build. There are 3 presets, a simple website (no backend), a Node application and a Node application with a SQlite database. For this demo, you can go for the second option.
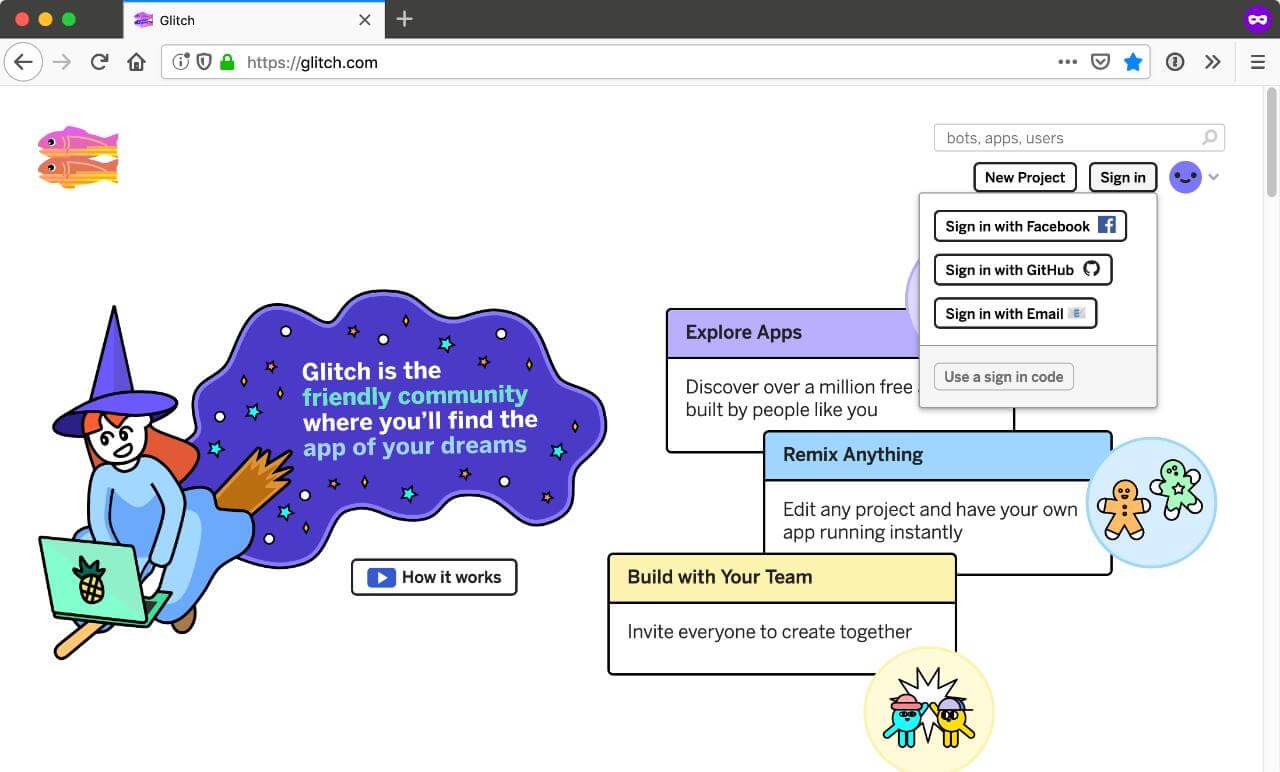
If you’d like to make sure your project persists, it’s a good idea to sign up for a Glitch account. Glitch has been making feature improvements fairly frequently, so this may change if you’re reading far into the future, but as of time of writing, they support sign in via Facebook, GitHub, email or sign-in code.
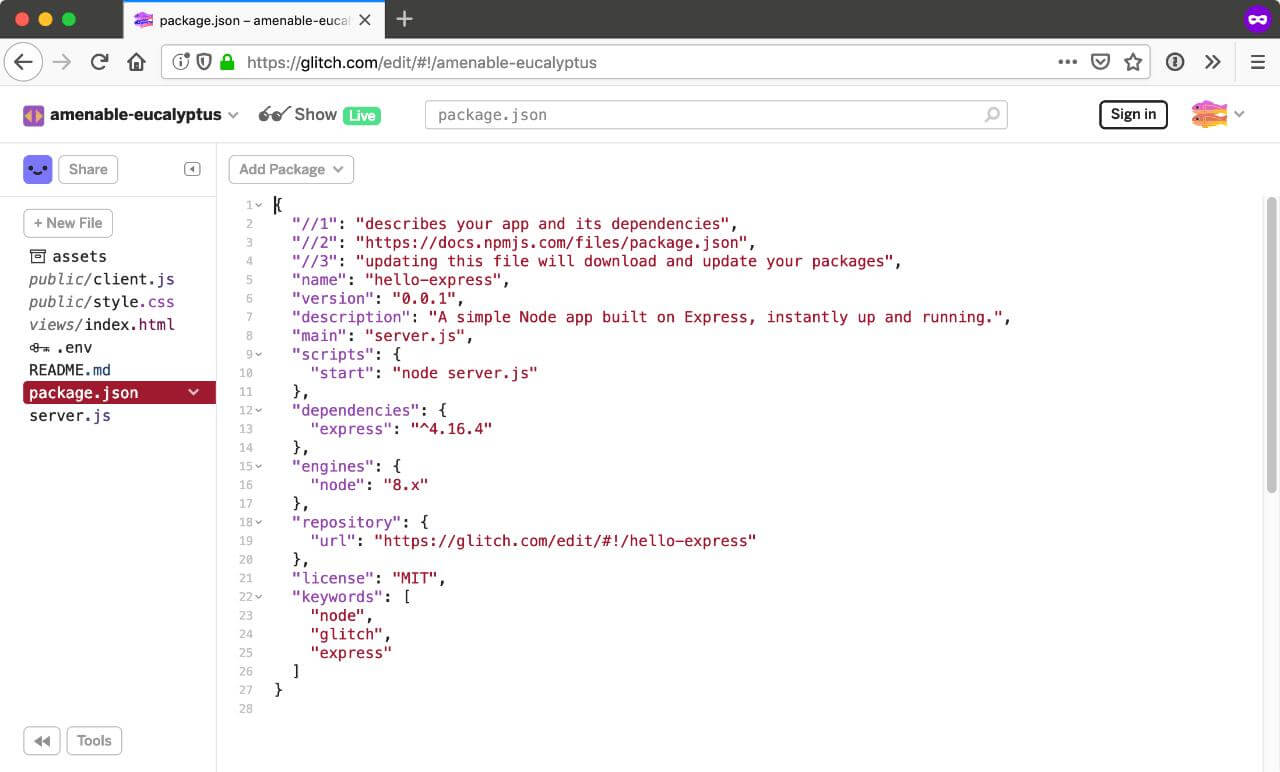
By default, Node applications on Glitch run on Express, which is totally fine. This particular project uses Koa.js, so there are a couple more steps to go through for that.
If you click on Tools at the bottom left of the screen, you will bring up some options, like Logs, Console, Container Stats and so on.
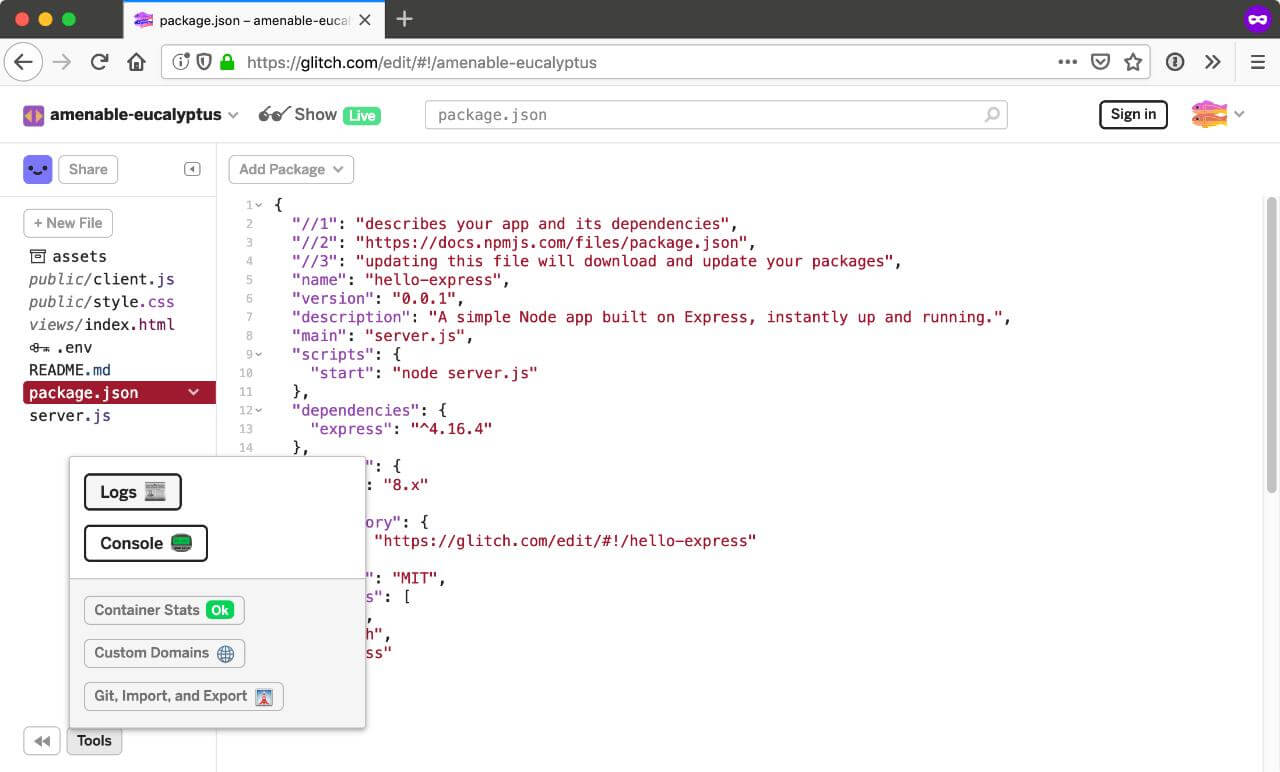
Logs is great to have open when developing your application because everything you console.log() shows up here.
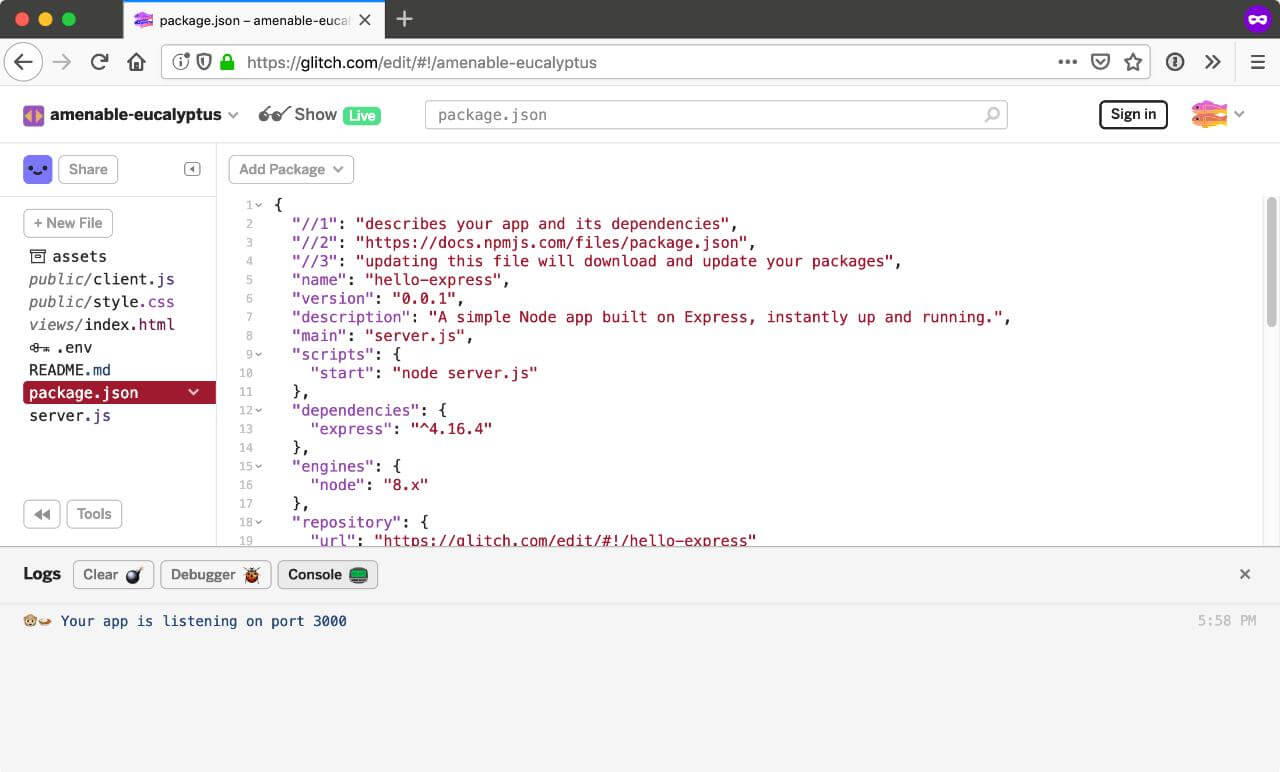
To customise the npm modules you want to use in your project, you can access the command line as you would your local machine or remote server. One thing to note is that instead of npm, Glitch uses pnpm as the package manager.

Remove express by running the following:
pnpm uninstall express
Then, install Koa.js by running the following:
pnpm install koa --save
To verify the npm modules being used in your project, you’ll have to refresh the environment:
refresh
Once you’ve done that, you should see an “Error” indicator next to Tools. That’s fine because in the server.js file, we are requiring the Express framework which is no longer there.
The next thing to do is to rewrite basic server code to use Koa.js. You can do that yourself or paste the following code into your newly created file.
const Koa = require('koa')
const port = process.env.PORT || 3000
const app = new Koa()
app.use(async ctx => {
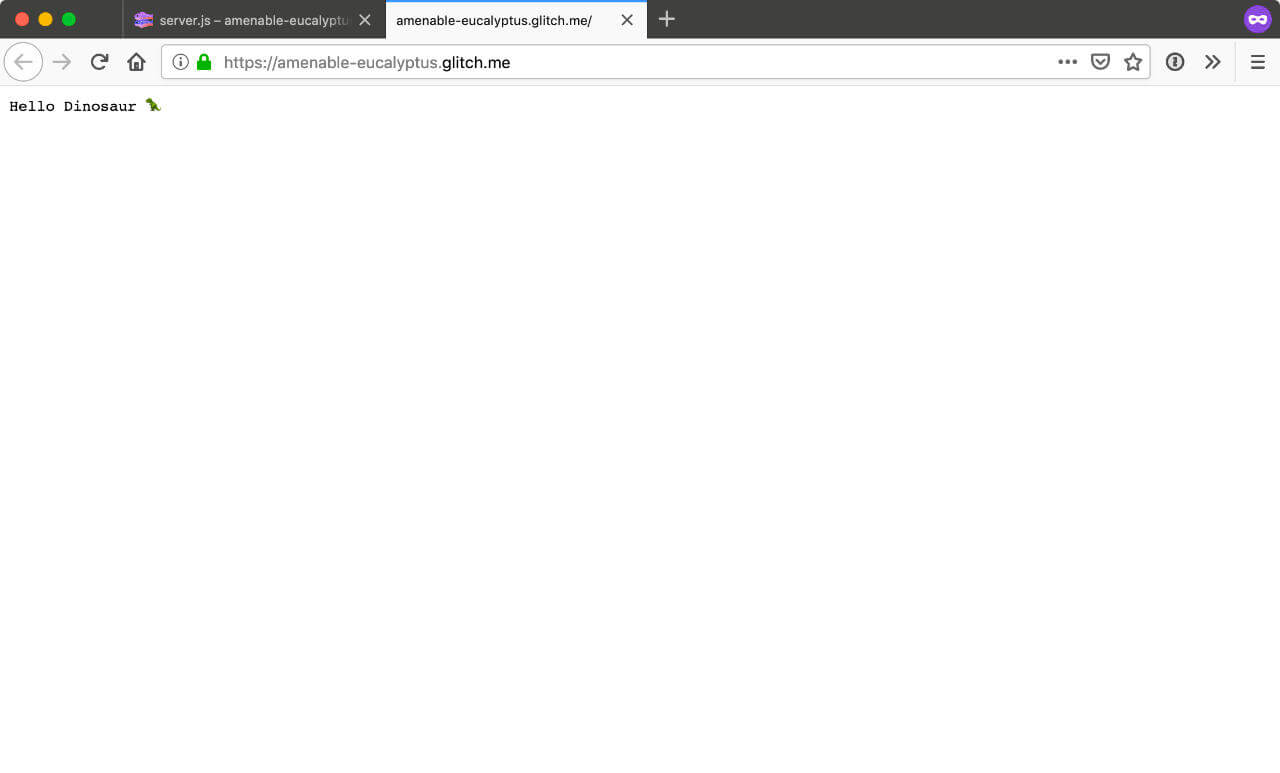
ctx.body = 'Hello Dinosaur 🦖'
})
const listener = app.listen(port, function() {
console.log('Your app is listening on port ' + listener.address().port)
})
If all went well, clicking on the Show button on the top nav bar should trigger your application in a new window with the text, “Hello Dinosaur 🦖”.
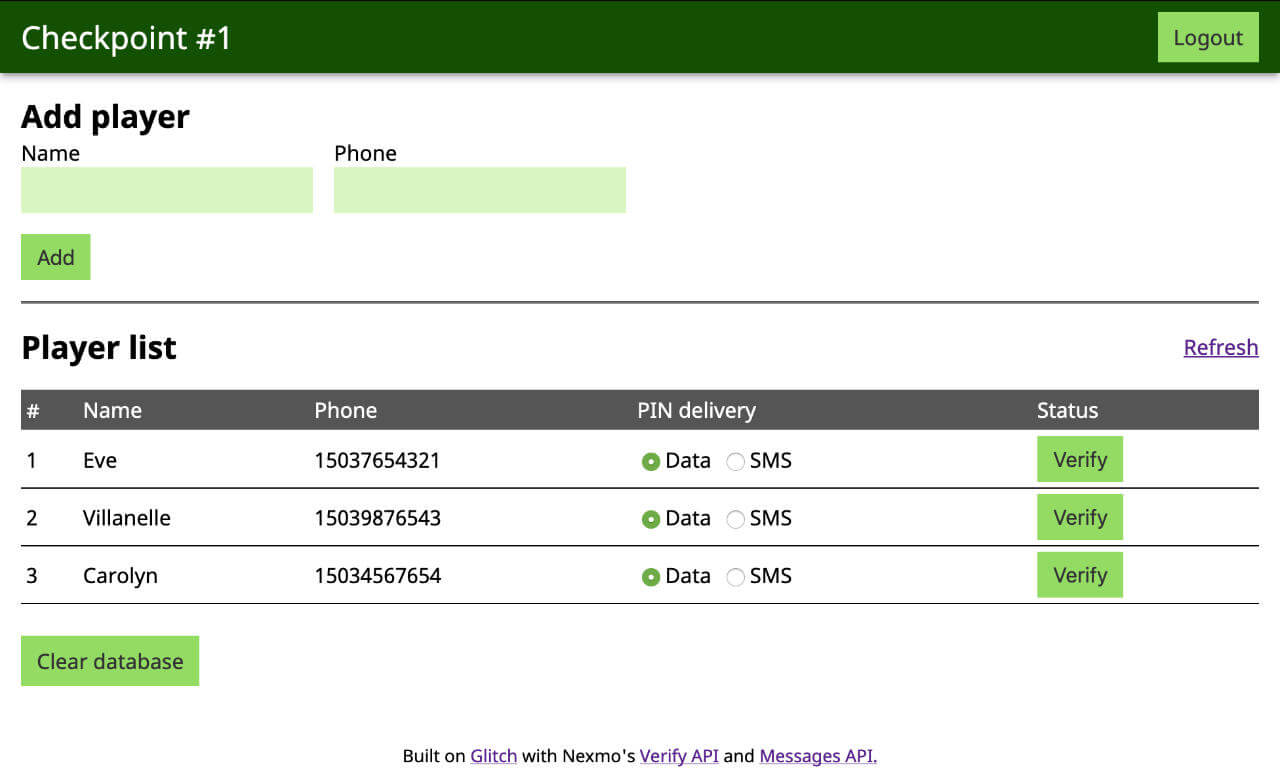
The application structure
By right, there should be some proper user management for administrators. If you access the live demo on Glitch, you’ll see there is some semblance of password protection, but it is a very naive implementation for this simple prototype. The prototype merely presents the idea of how the interface would work.
This means the application will have 3 pages, the login page, the administrator page, the verification code entry page.

As mentioned earlier, some additional middlewares need to be installed. This project uses the following:
koa-staticfor serving static assetskoa-bodyparserfor handling data sent over via POST requestskoa-routerfor routingkoa-viewsfor rendering nunjucks templates (also requires nunjucks to be installed)koa-sessionfor basic password protection (not for production)
Serving static assets
const serve = require('koa-static')
app.use(serve('./public'))
This is probably going to be the least complicated bit to cover, the serving of static assets like CSS and client-side Javascript from the /public folder.
Basic routing and rendering
The plan is to get everything working without any client-side Javascript. So user inputs are submitted via HTML forms, and if necessary, a redirect to the appropriate page after submission. Each page is its own HTML file and is rendered with koa-views, which provides a render() function.
const Router = require('koa-router')
const views = require('koa-views')
const router = new Router()

app.use(views('./views', { map: { html: 'nunjucks' }}))

router.get('/login', (ctx, next) => {
  return ctx.render('./login')
})

router.get('/', (ctx, next) => {
  return ctx.render('./index')
})

router.get('/verify/:phone', (ctx, next) => {
  const phone = ctx.params.phone
  return ctx.render('./verify')
})

router.get('/result/:phone', (ctx, next) => {
  const phone = ctx.params.phone
  return ctx.render('./result')
})
koa-router also provides a way to access URL parameters via ctx.params, used for /verify/* and /result/*, which is used to match phone numbers to the generated verification code. This will make more sense once we go through how the Verify API works.
Verify API
There are 2 steps involved when using the Verify API. The first is to trigger an SMS containing the one-time password (OTP) to the target recipient’s phone number.
nexmo.verify.request({
  number: RECIPIENT_NUMBER,
  brand: NEXMO_BRAND_NAME
}, (err, result) => {
  if (err) {
    console.error(err)
  } else {
    const verifyRequestId = result.request_id
    console.log('request_id', verifyRequestId)
  }
})
The HTTP response from the Verify request API looks like this:
{
  "request_id": "aaaaaaaa-bbbb-...",
  "status": "0",
  "error_text": "error"
}
If the status is anything other than 0, the request was unsuccessful and details about why can be found in error_text. Otherwise, the target recipient should receive an OTP via SMS. They must then enter this OTP into your application, which can be verified against the original request_id.
nexmo.verify.check({
  request_id: REQUEST_ID,
  code: CODE
}, (err, result) => {
  if (err) {
    console.error(err)
  } else {
    console.log(result)
  }
})
The HTTP response from the Verify check API looks like this:
{
  "request_id": "aaaaaaaa-bbbb-...",
  "event_id": "0A00000012345678",
  "status": "0",
  "price": "0.10000000",
  "currency": "EUR",
  "error_text": "error"
}
Handling multiple players
The checkpoint administrator needs to keep track of all the players, so it might be a good idea to use a database to store that information. This demo uses lowdb, which is a small local JSON database based on Lodash, but you’re definitely free to use any database you like.
There are a number of database-related functions for adding players, retrieving information about players and updating player information. By organising the functions in this way, it becomes easier to swap out databases because the logic remains the same regardless.
function dbAddPlayer(data) {
  db.get('players')
    .push({ name: data.name, phone: data.phone })
    .write()
  console.log('New user inserted in the database')
}

function dbGetPlayers() {
  return db.get('players').value()
}

function dbPlayerCount() {
  return db.get('players').size().value()
}

function dbAddId(phone, requestId, mode, status) {
  db.get('players')
    .find({ phone: phone })
    .assign({ id: requestId, delivery: mode, status: status })
    .write()
}

function dbUpdateStatus(requestId, status) {
  db.get('players')
    .find({ id: requestId })
    .assign({ status: status })
    .write()
}

function dbFindPlayer(phone) {
  return db.get('players').find({ phone: phone }).value()
}

function dbClear() {
  db.get('players')
    .remove()
    .write()
  console.log('Database cleared')
}
You can use a web form to collect the required information for creating a new player. For this demo, only 2 fields are required, the player name and their phone number.
<form id="addPlayerForm" action="add" method="post">
  <h2>Add player</h2>
  <div class="inputs">
    <label>
      <span>Name</span>
      <input name="name" required>
    </label>
    <label>
      <span>Phone</span>
      <input type="tel" name="phone" required>
    </label>
  </div>
  <button id="addPlayer">Add</button>
</form>
Submitting this form will send a POST request to /add, which means you need to create a route to handle this incoming data, then store it in the database.
router.post('/add', (ctx, next) => {
  const payload = ctx.request.body
  dbAddPlayer(payload)
  ctx.status = 200
  ctx.response.redirect('/')
})
You can then render information from the database onto the page with Nunjucks. Nunjucks provides a render() function which allows you to pass data to your Nunjucks template. Modify the GET route for / so you can render player information from the database to the page.
router.get('/', (ctx, next) => {
  const players = dbGetPlayers()
  return ctx.render('./index', { players: players })
})
You can then plug player values into the template and render them however you’d like your player data structured.
Triggering the OTP
The Verify API requires the player’s phone number to trigger the OTP request. You can send this information to the backend via another web form submission, this time posting to /verify/{{ player.phone }}, allowing you to get the phone number via ctx.params.phone and pass it to the Verify API’s request function.
router.post('/verify/:phone', async (ctx, next) => {
  const phone = ctx.params.phone
  const result = await verify(phone)
  dbAddId(phone, result.request_id, payload.delivery, 'pending')
  ctx.status = 200
  ctx.response.redirect('/')
})

// Verify API's request function
async function verify(number) {
  return new Promise(function(resolve, reject) {
    nexmo.verify.request({
      number: number,
      brand: process.env.NEXMO_BRAND_NAME
    }, (err, result) => {
      if (err) {
        console.error(err)
        reject(err)
      } else {
        resolve(result)
      }
    })
  })
}

// Add request ID to the database
function dbAddId(phone, requestId, mode, status) {
  db.get('players')
    .find({ phone: phone })
    .assign({ id: requestId, delivery: mode, status: status })
    .write()
}
The request_id, which is part of the API response, will be needed for the subsequent check() function. This function will be used to verify the request_id against the code entered by the player. This is stored in the database via the dbAddId() function.
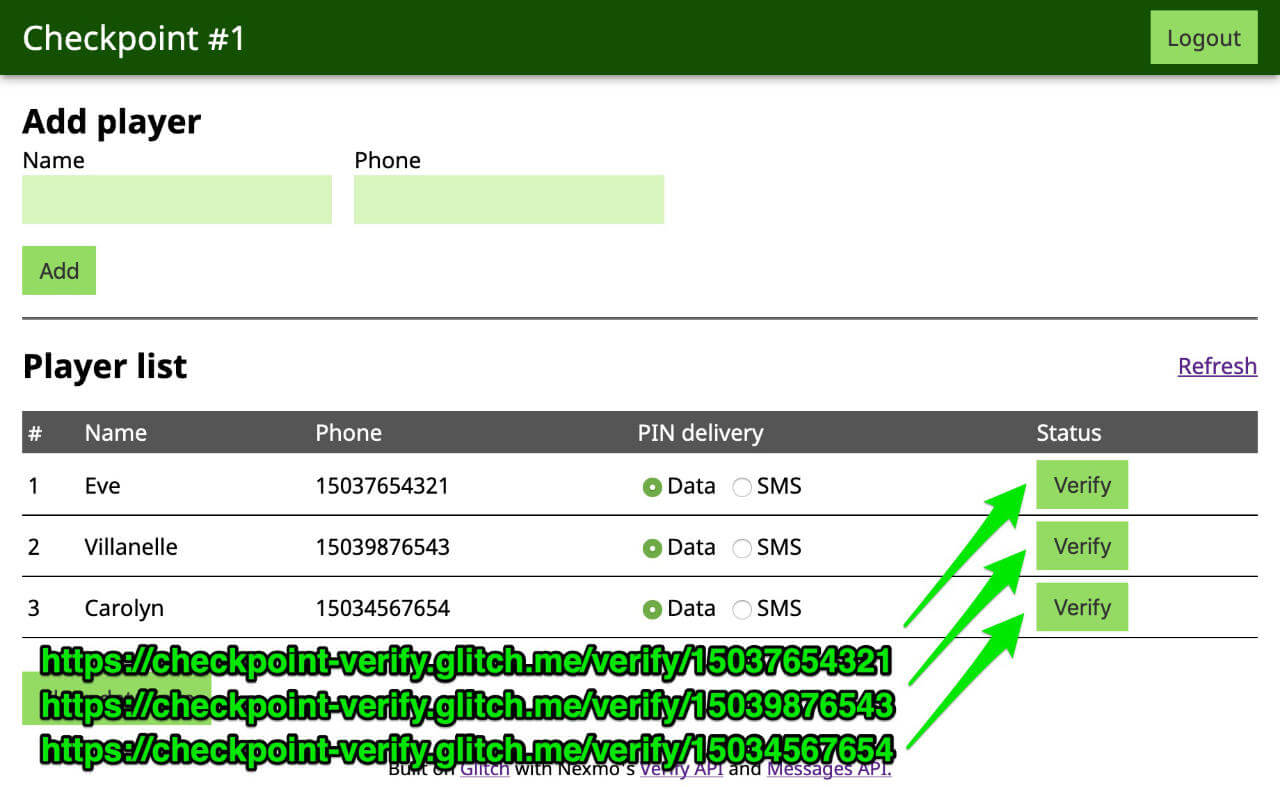
Checking the OTP
Players can enter the verification code at the unique URL, /verify/{{ player.phone }}. You would need to pass the phone number back to the page so your GET route would resemble that of /, which includes the render() function.
router.get('/verify/:phone', (ctx, next) => {
  const phone = ctx.params.phone
  return ctx.render('./verify', { phone: phone })
})
The web form for players to enter their OTP will look something like this:
<form method="post" action="/check" id="checkPinForm">
  <input name="pin" type="number">
  <input type="hidden" name="phone" value="{{ phone }}">
  <button>Submit</button>
</form>
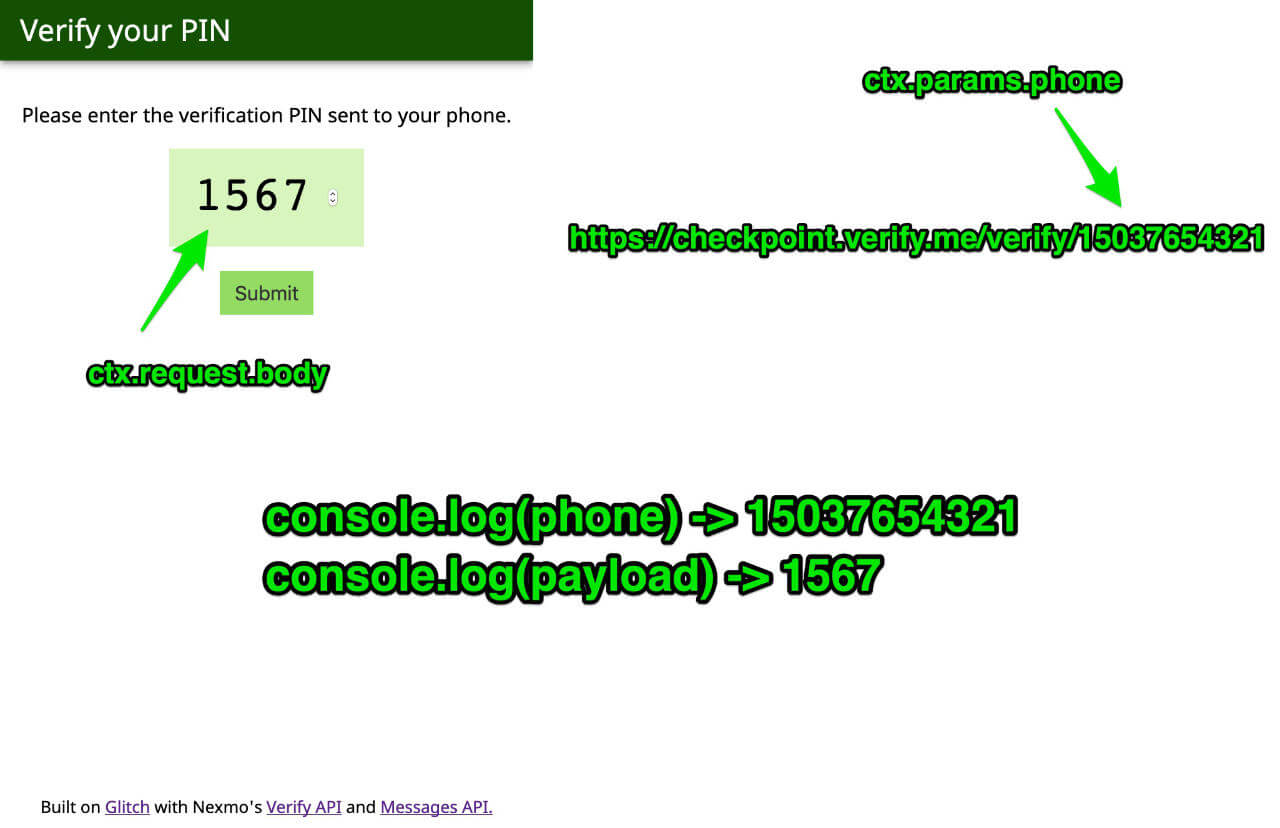
When the player submits the OTP, you can retrieve the original request_id from the database, and pass both the request_id and PIN to the Verify API’s check() function.
router.post('/check', async (ctx, next) => {
  const payload = await ctx.request.body
  const phone = payload.phone
  const code = payload.pin

  const requestId = dbFindPlayer(phone).id

  const result = await check(requestId, code)
  dbUpdateStatus(requestId, result.status)

  ctx.status = 200
  ctx.response.redirect('/result/' + payload.phone)
})

// Verify API's check function
async function check(requestId, code) {
  return new Promise(function(resolve, reject) {
    nexmo.verify.check({
      request_id: requestId,
      code: code
    }, (err, result) => {
      if (err) {
        console.error(err)
        reject(err)
      } else {
        resolve(result)
      }
    })
  })
}

// Update player status in the database
function dbUpdateStatus(requestId, status) {
  db.get('players')
    .find({ id: requestId })
    .assign({ status: status })
    .write()
}
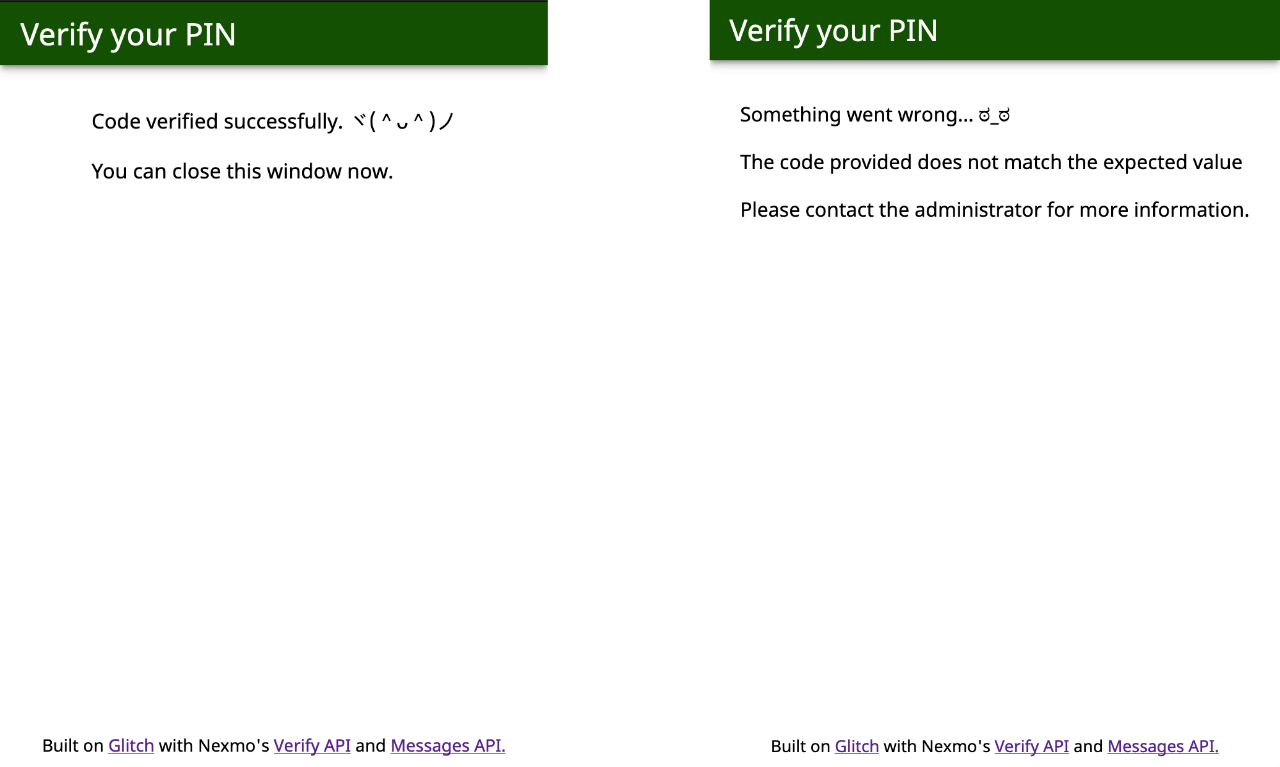
A successful verification will return a status code of 0, which you can use to determine which status message to show the user on the results page.
<main>{% raw %}
  {% if status == 0 %}
  <p>Code verified successfully.</p>
  <p>You can close this window now.</p>
  {% else %}
  <p>Something went wrong…</p>
  <p>Please contact the administrator for more information.</p>
  {% endif %}{% endraw %}
</main>
Additional things you can do
Nexmo’s Messages API can be used to add additional functionality to this project as well. You could trigger an additional SMS containing the link to the verification page for a better user experience, for example.
Or, maybe your game is taking place in a fairly remote location, think Pulau Perhentian (pictured below), or for some reason your players don’t have mobile data. So instead of checking the code via a web interface, players can respond via SMS.

The version hosted on Glitch covers the above 2 scenarios so feel free to check it out and remix it.
This prototype is a demonstration of what is possible with the Verify API, but again, for this to become a fully-fledged application, there are numerous things that have to be taken care of. One of the most important is error handling. The Verify API returns a status value of 0 for successful queries, but any other value indicates an error.
These errors should be handled and the user interface on the frontend should reflect any potential errors preventing successful verification. It might also be a good idea to implement some sort of frontend validation, or even utilise Nexmo’s Number Insight API to ensure only valid phone numbers are passed to the Verify API.
Where Next?
If you are keen to do more with these APIs, here are some links that might be helpful to you:
- Documentation for the Verify API on the developer portal
- Series of tutorials for various Nexmo APIs
- If you need us, try the Nexmo Community Slack channel
- Let us know what you think by tweeting at @NexmoDev