First of all, British spelling. Now that’s out of the way, I recently created a custom colour scheme for Sublime Text, and thought I’d write up a quick note for anyone who’s interested in doing the same.
There are already thousands (I’m guessing) of colour schemes out there already, so if you have better things to do with your life than pick colours, then please, carry on. I personally loved CodePen’s Oceanic Next dark theme but just couldn’t find an existing theme that looked like it.
The original Oceanic Next theme by Dmitri Voronianski looks awesome, but somehow my files didn’t turn out as colourful as they did in the screenshot. Probably has to do with the fact that it was optimised for babel-sublime? I dont know… ¯\_(ツ)_/¯
UI theme versus Colour Scheme
There are 2 parts to Sublime Text, the part where you do your work and write your code, and the part which is the user interface of Sublime Text itself, e.g. the sidebar, tabs etc.
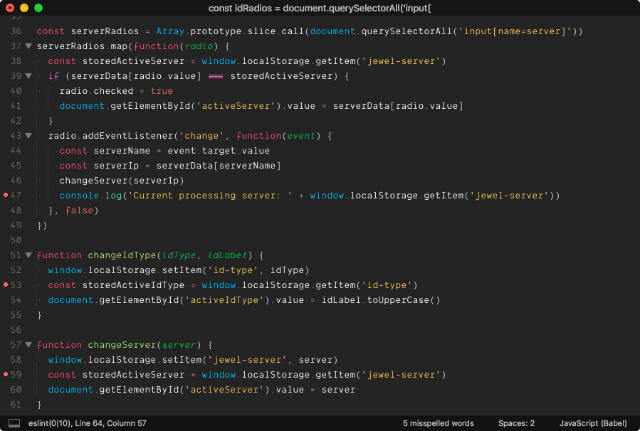
Colour schemes apply to the work part, and determines the highlighting of source code and their resultant colours, stuff like classes, functions, libraries, constants, you name it. These schemes use the .tmTheme (legacy) format or the .sublime-color-scheme (new since build 3149) format. The legacy .tmTheme files utilise the XML format, while the newer .sublime-color-scheme files utilise JSON formatting.
UI themes have the .sublime-theme extension and is a JSON format which specifies rules for matching elements and modifying their appearance. Full documentation covers the various properties and elements that can be customised.
Why bother creating your own?
Excellent question. I briefly mentioned earlier that I was enamoured with CodePen’s version of Oceanic Next, but couldn’t find a comparable one anywhere.
Also, I had just purchased Phil Plückthun’s excellent Dank Mono and wanted to figure out what to tweak to get my HTML attributes, comments and function arguments to display in italics.
Turns out, most search results are for finding and installing existing themes, but not too many articles talk about the actual creation process. Hmmm, I wonder why… (read in obnoxiously sarcastic tone) The best I could find was this 4-step article on Bobobobo’s (AKA William Sherif) weblog on How to create a custom theme in Sublime Text 3.
Step 1: Creating the .tmTheme file
Why not use the newer file format? Again, excellent question. Well, turns out I did NOT read the docs before plunging head-first into this enterprise. And because there are way more colour schemes that use .tmTheme than .sublime-color-scheme, I assumed .tmTheme was the way to go.
Fun fact: only found out about .sublme-color-scheme when I attempted to figure out how to publish my theme to Package Control after some colleagues asked if they could have the theme too. 🤦♀️
Anyhoo, after poking around a bit more, I discovered the existence of tmTheme Editor, which is a handy online GUI for editing and generating .tmTheme files. Personally, I think that is a great way to get it done, but I did not use this lovely little web application.
Instead, I downloaded one of the .tmTheme files and proceeded to do the customisation directly via, who else, Sublime Text. There are general settings, and individual scope styles, and all the styles are <dict> elements nested in an <array> element.
Global settings determine the overall colours for the scheme, foreground, background and caret colour. Looks something like this:
<!-- Global settings -->
<dict>
  <key>settings</key>
  <dict>
    <key>background</key>
    <string>#222222</string>
    <key>foreground</key>
    <string>#EEEEEE</string>
    <key>caret</key>
    <string>#FFFFFF</string>
  </dict>
</dict>
Everything that follows are for individual scopes:
<!-- Scope styles -->
<dict>
  <key>name</key>
  <string>Comment</string>
  <key>scope</key>
  <string>comment</string>
  <key>settings</key>
  <dict>
    <key>foreground</key>
    <string>#888888</string>
  </dict>
</dict>
<dict>
  <key>name</key>
  <string>String</string>
  <key>scope</key>
  <string>string</string>
  <key>settings</key>
  <dict>
    <key>foreground</key>
    <string>#FFD500</string>
  </dict>
</dict>
Each scope style rule consists of a <dict> tag with 3 pairs of <key>/<string> tags for name, scope and settings, where the settings <dict> tag can contain <key> tags for foreground, background and fontStyle.
Don’t be like me. Read the docs. They are excellent.
To figure out what .tmTheme files are all about, go to .tmTheme Color Schemes .
To figure out the minimal set of scopes to include in your theme, go to Usage in Color Schemes.
To figure out which scopes will style which tokens in a syntax, go to Scope Naming .
Step 2: Install your custom theme
Regardless if you’re on a Mac or Windows machine, go to Preferences -> Browse packages… and this should bring up a Finder window, navigated to the Packages folder. If there is already a Themes folder in there, then chuck your .tmTheme file in there, otherwise, create one, then chuck your .tmTheme file in there.
Trigger the Command Palette by pressing Ctrl+Shift+P (on Windows) or Command+Shift+P (on Mac) and search for UI. Your top 2 results should be UI: Select Theme and UI: Select Color Scheme.
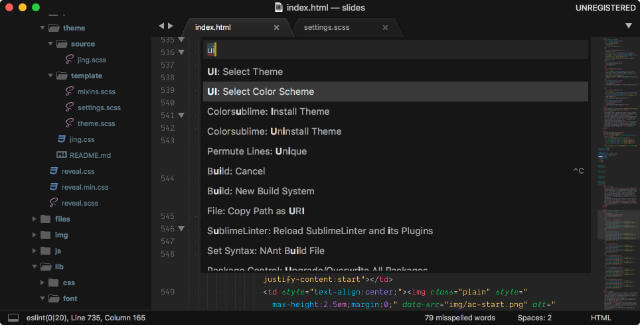
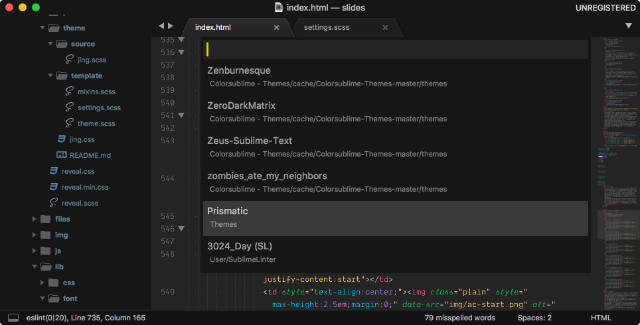
Choose UI: Select Color Scheme and you should be able to find your custom theme as one of the options.
Step 3: Share with friends
Some of my colleagues wanted to try out my theme too, and I could have just sent them the .tmTheme file, but then I got curious to how packages got onto Package Control to begin with. So again, read the docs. The Submitting a Package page is pretty comprehensive.
If you, like me, are simply interested in submitting a colour scheme, you could probably skip the bit about preparing your repository in there. The gist of it is:
- Host the
.tmThemesomewhere, it could be a public git repository or your own web server. - If you’re going the git route, make sure to tag each release with the appropriate version. If you host your own, use semantic versioning in your
package.jsonfile - Fork the package control channel and clone it to your own machine. Add your theme to the appropriate file (it’s alphabetically organised) in the package_control_folder
- Install the ChannelRepositoryTools package via Package Control and run the tests. Make sure they pass.
- Create a pull request and be patient.
I’m currently at the be patient part of the instructions, so hopefully my theme will eventually make it onto Package Control.
If you go the git repository route, feel free to write up a good README file, with screenshots and all. I’m going to make mine more comprehensive if it ever makes it to Package Control, and probably start porting it to the new file format.
My theme is called Prismatic, and is currently hosted on GitHub. If you use a font that supports cursive italics and ligatures, all the more fun. For me, at least. Font in the screenshot is Dank Mono.