Store locators are a useful functionality for businesses who have multiple outlets. Drupal has a number of map rendering modules that allow us to provide store locator functionality. This article will cover the basics of setting up a simple store locator with proximity search functionality.
Create and setup location content type
Required modules
- Address Field
- Geocoder
- Geofield
- geoPHP (dependency for Geocoder and Geofield)
- Chaos tools suite (ctools) (dependency for Address Field)
- Display Suite (Optional: to manage the content display)
-
Install the required modules.
drush dl addressfield geocoder geofield geophp ctools -y -
Enable the required modules.
drush en addressfield geocoder geofield geofield_map geophp ctools -y -
Go to
admin/structure/types/addand create your location content type. -
Add a new field for Address.
 Click Save, then click Save field settings. You can adjust the defaults settings to suit your locale, if you wish, then click the Save settings button.
 -
Add new field for Position.
 Click Save, then click Save field settings.
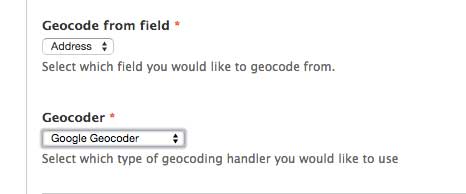 Select Address from the drop-down for the Geocode from field option, and select Google Geocoder for the Geocoder option. You can tweak the other default settings, if you wish.
 -
Optional steps: To setup display for the new content type
- Install Display suite.
drush dl ds -y - Enable Display Suite and Display Suite UI
- Go to
admin/structure/types/manage/location/displayand activate display suite settings for your new content type by choosing a layout and click Save. I'm using One column for this example.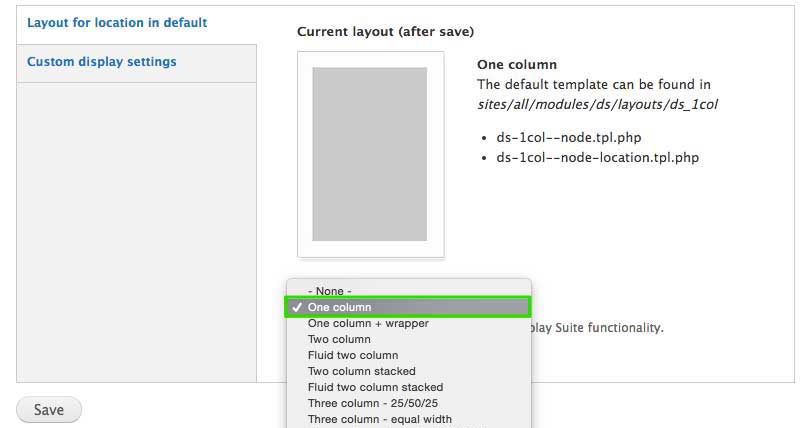
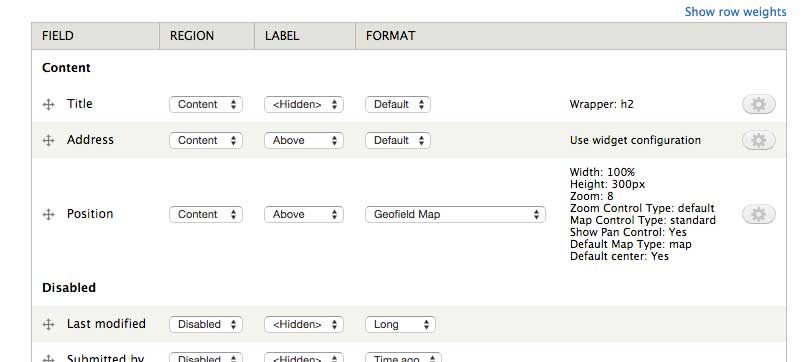
- Select the fields you want displayed and click Save.
- Do the same for any other view modes you will be using.
-
If you chose not to use Display suite, you still need to make sure the Format for the Position field is set to Geofield Map. If you do not see the Geofield Map option in the drop-down, check that the Geofield Map module is enabled. This module is part of the Geofield module.
drush en ds ds_ui -yImporting Location data using feeds
If you have a lot of data, it doesn’t make sense to enter each location manually. I suggest using Feeds to import the data instead.
This particular example uses data from a spreadsheet, which is easily converted to CSV via Excel.For setting up feeds in other formats, refer to my previous post on Feeds.
-
Install the Feeds module.
drush dl feeds -y -
Enable Feeds, Feeds Importer and Feeds UI.
drush en feeds feeds_importer feeds_ui -y -
Go to
admin/structure/feedsand click on ➕ Add importer. -
Under Basic settings, select Off for the Periodic import option.
-
Change the Fetcher to File upload. You can retain the default settings for this.
-
Change the Parser to CSV parser. You can keep the default settings for this as well.
-
Keep the Processor as Node processor and under Bundle, select the new content type you created earlier. You can keep the default settings, if you wish.
-
For Mapping, ensure all the fields in your data set are mapped out accordingly, with the headers of your CSV file matching the SOURCE exactly. My dataset has the following field mapping:

With reference to the official documentation, take note of the following:
- Always supply a country value in their two character ISO 3166-1 country codes.
- Address components are as follows:
- Address: Country => Country
- Address: Administrative area => State
- Address: Locality => City
- Address: Postal code => Postal Code
- Address: Thoroughfare => Address 1
- Address: Premise => Address 2
- Go to
importand select the importer you just created. - Import your CSV file. Cross your fingers and hope everything imports successfully.
Create and setup location views
Required modules
- Views
- IP Geolocation Views & Maps
- Libraries API (dependency for IP Geoloc)
- Entity API (dependency for IP Geoloc)
- Leaflet
Part 1: Location listing
-
Install required modules.
drush dl views leaflet libraries entity ip_geoloc -y -
Enable the required modules.
drush en views views_ui leaflet leaflet_views ip_geoloc libraries entity -y -
Create a libraries folder in the
sites/allfolder. Download the Leaflet JavaScript Library and extract the files to the libraries folder. Ensure the folder name isleaflet.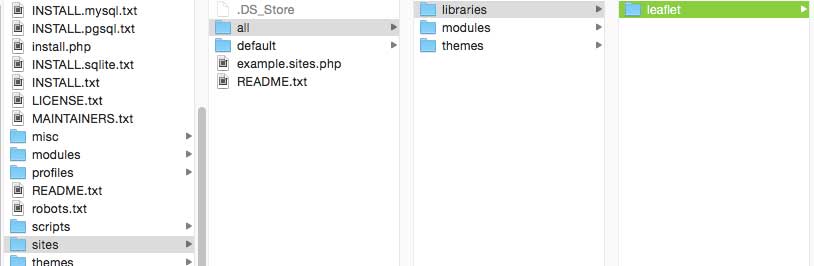
-
Go to
admin/structure/views/addand create a new view for the Location content type. Check Create a page and fill in the fields as you see fit, then click Continue & edit. These options can be changed on the next screen.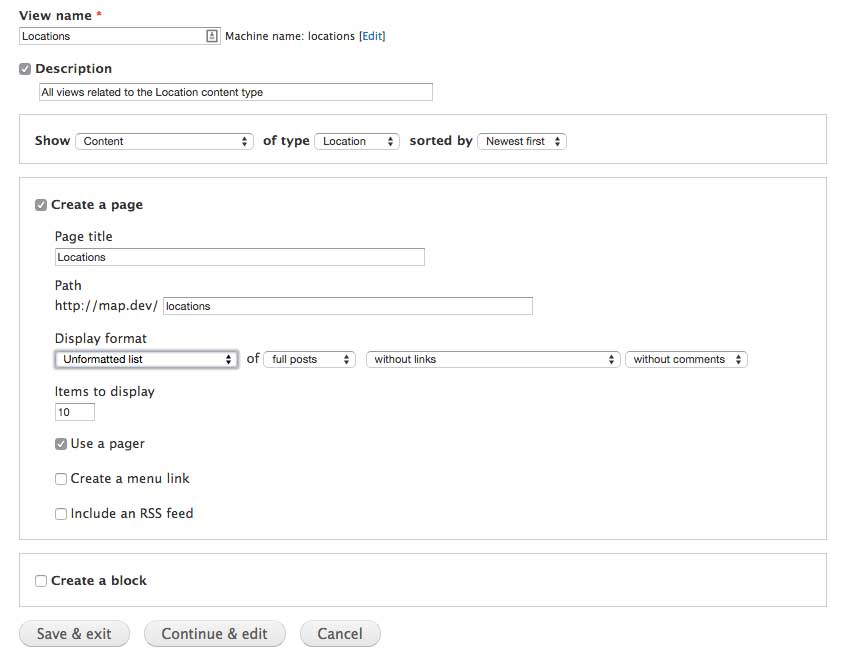
-
Under Format, change the Show options to Fields.
-
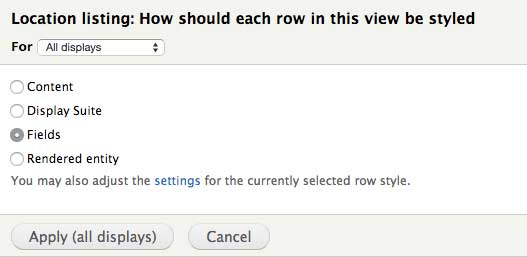
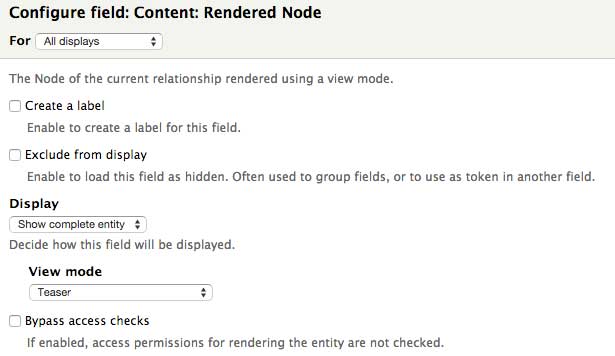
Add a Rendered Node field. Click on Add and type Rendered Node in the search filter. Check Content: Rendered Node and click Apply.
-
Select Show complete entity under Display and choose the view mode you used for displaying your fields when you set up the Location content type.
-
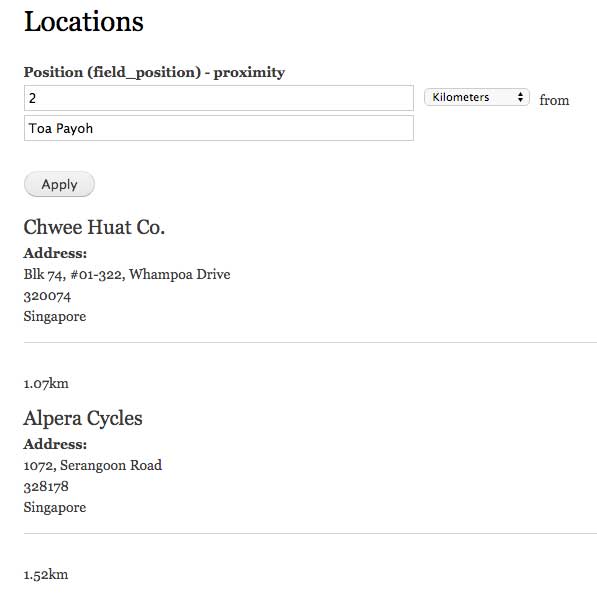
Add a Proximity field. Click on Add and type Proximity in the search filter. Check Content: Position (field_position) - proximity and click Apply. Adjust the field settings as you see fit. I recommend checking the Round option and specifying Precision to 2, as the default option gives a long string of decimal points.
 Set the Source of Origin Point to Exposed Geofield Proximity Filter.
 -
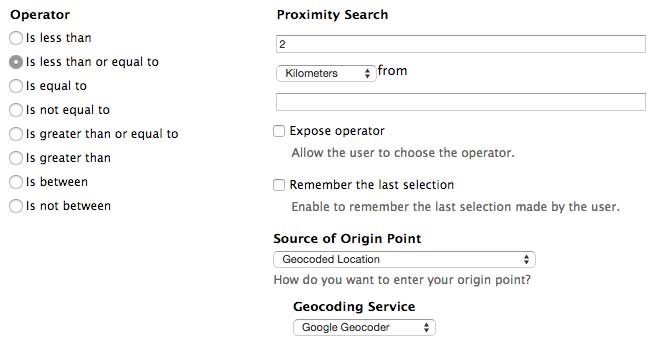
Add a Proximity filter. Under Filter, click on Add and type Proximity in the search filter. Check Content: Position (field_position) - proximity and click Apply.
-
Check Expose this filter to visitors. Change the Label if you need to, this field can be left blank. Set the Operator to is less than or equal to and enter the starting value in the Proximity Search field.
-
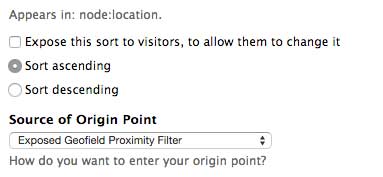
Remove all existing Sort Criteria. Click on Add and type Proximity in the search filter. Check Content: Position (field_position) - proximity and click Apply. Select Sort ascending, and under Source of Origin Point, select Exposed Geofield Proximity Filter.
-
Go to the path of your views page to check that the listing is rendering correctly. Test the proximity search by typing a location into the exposed filter.
Part 2: Map display
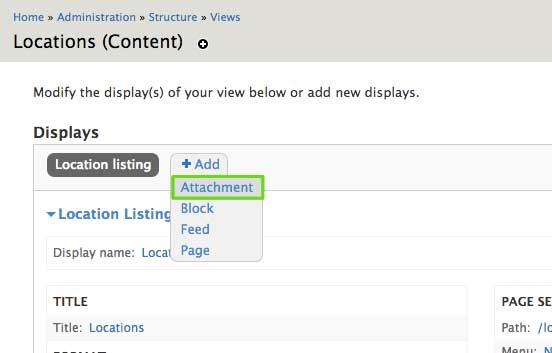
- Add a new Attachment view display to the Location view.
- Add a Position field. Click on Add and type Position in the search filter. Check Content: Position and click Apply.
- Check Exclude from display. This field is used for plotting the locations on the map. Pick Latitude/Longitude as the formatter and click Apply.
- Under Format, choose This attachment (override), select Map (Leaflet API, via IPGV&M) and click Apply.
- Adjust the height of the map as you see fit. Under Name of latitude field in Views query, select Content: Position, the field you just added.
- The location marker styles can be customised and the help text provides detailed information on how to do that. For this example, I chose green as the default marker and left the Visitor marker as default, so they are differentiated.
- Under Map centering options, select Center the map on visitor’s current location.
- Under No locations behaviour, enter visitor so the map will centre on the user’s location when no results are found.
- Click on More map options to reveal the map zoom settings. For this example, the default Initial zoom level was too low, and I set it to 15 instead.
- There are many customisation options that IP Geolocation provides, and you can tweak them to suit your needs. Click Apply when done.
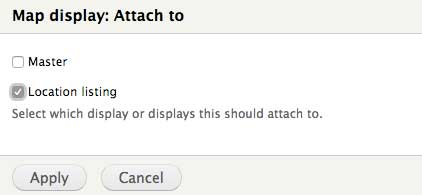
- Under Attachment settings, attach the display to the listing view created in Part 1. Ensure that Inherit exposed filters is set to Yes.
- Go to the views page URL and check that your map is rendering correctly.
Next steps
Once everything is rendering correctly, it’s just a matter of theming the views to look like your design.
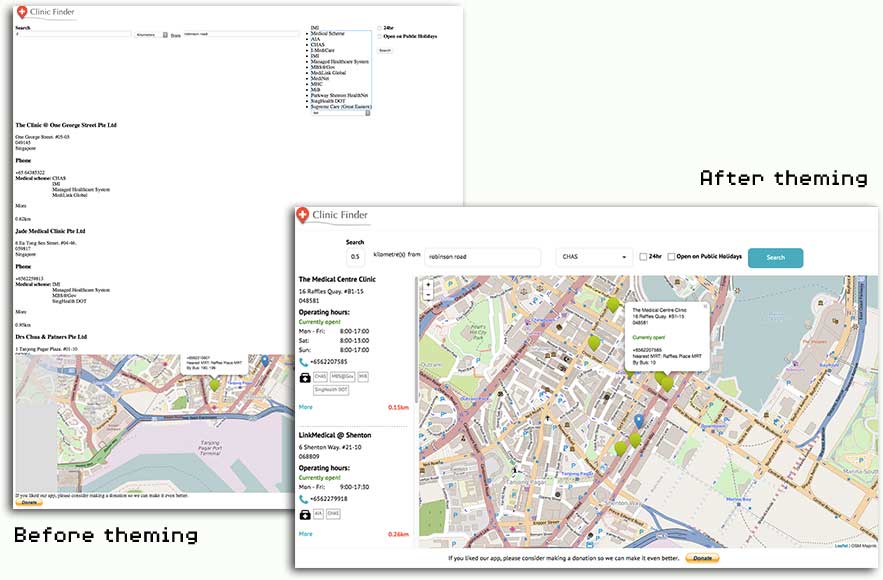
This was pretty much the summary of how I implemented IP Geolocation and Leaflet for Battlehack. I was quite satisfied with the end result as the map was smooth and responsive. If your project requires map rendering, why not give this combination a try?