After more than a year with Jekyll, I’ve settled into a workflow that allows me to spin up and develop new sites really quickly with the help of gulp. Normally my sites are project pages, because GitHub only allows one user/organisation page but unlimited project pages, but the setup process only differs slightly for the two. An additional step is needed to create an orphan gh-pages branch for project pages.
As an aside, I couldn’t help but think of Snap, Crackle and Pop when writing the title for this post.

Snap, Crackle, Pop.
Gulp, Jekyll, GitHub.
What do you mean no link? Am I the only one who sees the connection? Oh, never mind. ¯\_(ツ)_/¯
Setting up the GitHub repository
This example will use SingaporeCSS as the organisation. Replace singaporecss with your own user name or organisation name.
-
Create a repository called singaporecss.github.io.
-
Open the terminal, navigate to the sites folder and clone the newly created repository.
git clone https://github.com/singaporecss/singaporecss.github.io -
To test that the repository was set up correctly, navigate into the project folder and create a test
index.htmlfile.cd singaporecss.github.io echo "This be the Talk.CSS website" > index.html -
Commit the file and push it up.
git add --all git commit -m "Initial commit" git push -u origin master -
Navigate to http://singaporecss.github.io and check the page. Whatever was put in the
index.htmlfile should load up in the browser.Something like this. 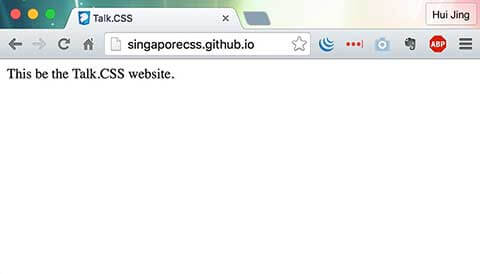
Now that things are linked up correctly, it’s time to get building. The test index.html can be nuked now.
Creating the Jekyll site
-
Add a
Gemfileto the root of the project folder which contains the following:source 'https://rubygems.org' gem 'github-pages'This ensures that the local environment matches that of GitHub, minimising issues with different gem versions and so on.
-
Navigate into your project folder and run
bundle install, which will install all the relevant gems GitHub pages needs -
Spin up a new Jekyll site in the project folder. Note that the
.indicates the current folder you’re in.jekyll new . -
If you check the folder, it should have a bunch of files and folders, which look something like this:
PROJECT_FOLDER/
|-- _config.yml
|
|-- _includes/
|   |-- footer.html
|   |-- head.html
|   |-- header.html
|   |-- icon-github.html
|   |-- icon-twitter.html
|   |-- icon-github.svg
|   |-- icon-twitter.svg
|
|-- _layouts/
|   |-- default.html
|   |-- page.html
|   |-- post.html
|
|-- _posts/
|   |-- 2014-11-14-welcome-to-jekyll.markdown
|
|-- _sass/
|   |-- _base.scss
|   |-- _layout.scss
|   |-- _syntax-highlighting.scss
|
|-- css/
|   |-- main.scss
|
|-- index.html
|-- about.md
|-- .gitignore
|-- about.md
|-- feed.xml
`-- _config.yml
If you are that rare human being that read my earlier post on how I got started with Jekyll and GitHub Pages, you’ll realise that the folder structure is different now. That’s because Jekyll has been updated to v3.0.3 (as of time of writing).
-
At this point, you can do whatever you want because you already have all the files needed to start off building your site. And here’s where my process kicks in.
The gulp-y bits
-
Remove all existing Sass files and replace with custom Sass starter files. If you want to use the existing Jekyll theme as a base to work off from, that’s great too.
-
Copy over the
package.jsonandgulpfile.jsfor Jekyll projects. Update the details like name and description as required. (I have a different set of these files depending on the type of project I’m building){ "name": "singaporecss.github.io", "version": "1.0.0", "description": "Dependencies for Talk.CSS website", "main": "gulpfile.js", "scripts": { "test": "echo \"Error: no test specified\" && exit 1" }, "repository": { "type": "git", "url": "git+https://github.com/SingaporeCSS/singaporecss.github.io.git" }, "author": "huijng <1461498+huijing@users.noreply.github.com>", "license": "ISC", "bugs": { "url": "https://github.com/SingaporeCSS/singaporecss.github.io/issues" }, "homepage": "https://github.com/SingaporeCSS/singaporecss.github.io#readme", "devDependencies": { "browser-sync": "^2.11.2", "gulp": "^3.9.1", "gulp-autoprefixer": "^3.1.0", "gulp-concat": "^2.6.0", "gulp-cssnano": "^2.1.1", "gulp-sass": "^2.2.0", "gulp-uglify": "^1.5.3", "susy": "^2.2.12" } } -
Each task in the
gulpfile.jshas a specific function. These are the tasks I have in my Jekyll sitesgulpfile.js.-
Declare all the plugins required for the project at the top of the file.
var gulp = require('gulp'); var browserSync = require('browser-sync'); var sass = require('gulp-sass'); var prefix = require('gulp-autoprefixer'); var cssnano = require('gulp-cssnano'); var concat = require('gulp-concat'); var uglify = require('gulp-uglify'); var cp = require('child_process'); -
Add indicator messages for when build tasks are running (completely optional)
var messages = { jekyllDev: '<span style="color: grey">Running:</span> $ jekyll build for dev', jekyllProd: '<span style="color: grey">Running:</span> $ jekyll build for prod', }; -
Build the Jekyll Site in development mode
gulp.task("jekyll-dev", function (done) { browserSync.notify(messages.jekyllDev); return cp .spawn("jekyll", ["build", "--drafts", "--config", "_config.yml,_config_dev.yml"], { stdio: "inherit", }) .on("close", done); }); -
Rebuild Jekyll & reload the page
gulp.task("jekyll-rebuild", ["jekyll-dev"], function () { browserSync.reload(); }); -
Wait for jekyll-dev task to complete, then launch the Server
gulp.task("browser-sync", ["sass", "scripts", "jekyll-dev"], function () { browserSync.init({ server: "_site", port: 1234, }); }); -
Compile files from _scss folder into both _site/css folder (for live injecting) and site folder (for future Jekyll builds)
gulp.task("sass", function () { return gulp .src("_sass/styles.scss") .pipe( sass({ includePaths: ["scss"], onError: browserSync.notify, }) ) .pipe(prefix(["last 15 versions", "> 1%", "ie 8", "ie 7"], { cascade: true })) .pipe(gulp.dest("_site/css")) .pipe(browserSync.reload({ stream: true })) .pipe(gulp.dest("css")); }); -
Compile files from _js/lib folder into both _site/js folder (for live injecting) and site folder (for future Jekyll builds)
gulp.task("scripts", function () { return gulp .src(["_js/lib/*.js"]) .pipe(concat("scripts.js")) .pipe(gulp.dest("_site/js")) .pipe(browserSync.reload({ stream: true })) .pipe(gulp.dest("js")); }); -
Watch scss files for changes & recompile. Watch html/md files, run jekyll & reload BrowserSync
gulp.task("watch", function () { gulp.watch(["_sass/**/*.scss", "_sass/*.scss"], ["sass"]); gulp.watch(["_js/**/*.js"], ["scripts"]); gulp.watch( [ "index.html", "_layouts/*.html", "_posts/*", "_includes/*.html", "_drafts/*", "**/*.html", ], ["jekyll-rebuild"] ); }); -
Build the Jekyll Site in production mode
gulp.task("jekyll-prod", function (done) { browserSync.notify(messages.jekyllProd); return cp.spawn("jekyll", ["build"], { stdio: "inherit" }).on("close", done); }); -
Identical Sass compilation task to development mode, with an additional minification step thrown in using cssnano
gulp.task("sass-prod", function () { return gulp .src("_sass/styles.scss") .pipe( sass({ includePaths: ["scss"], onError: browserSync.notify, }) ) .pipe(prefix(["last 15 versions", "> 1%", "ie 8", "ie 7"], { cascade: true })) .pipe(cssnano()) .pipe(gulp.dest("_site/css")) .pipe(gulp.dest("css")); }); -
Identical JavaScript compilation task to development mode, with an additional minification step thrown in using uglify
gulp.task("scripts-prod", function () { return gulp .src(["_js/lib/*.js"]) .pipe(concat("scripts.js")) .pipe(uglify()) .pipe(gulp.dest("_site/js")) .pipe(gulp.dest("js")); }); -
Default task, running just
gulpwill compile the sass, compile the Jekyll site, launch BrowserSync & watch files.gulp.task("default", ["browser-sync", "watch"]); -
Build task, run using
gulp buildto compile Sass and JavaScript ready for deployment.gulp.task("build", ["scripts-prod", "sass-prod", "jekyll-prod"]);
-
-
Run
npm installto install all the required node modules, then rungulpto spin up the BrowserSync server and start building your site with the advantage of live reload whenever you save your working files. 😎
Disclaimer: I’m pretty sure lots of people have much better workflows that the one outlined above. I know someone who uses just npm scripts to do something similar. Unfortunately, I’m not at that level of ninja yet. But you’d like to suggest improvements, I’d love to hear them.