Web applications these days are becoming more complex, thus having smooth transitions between view states as a form of functional animation has the practical benefit of reducing cognitive load, preventing change blindness and establishing better recall in spatial relationships.
Trying to animate between different DOM states used to involve a serious amount of Javascript and CSS because of the number of factors we had to take care of. In addition to the animations themselves, we also had to worry about handling the loading and rendering of content within the different states as well as potential accessibility issues.
The View Transitions API had been proposed in the CSS working group back in 2021, to allow transition animations when navigating between different application views. A lot of work has gone into this and the specification is now at Candidate Recommendation status.
How does it work?
Generally, if we want to animate something smoothly, it must have a start state and an end state, then we have to figure out how to fill in the gap between the two states in a gradual manner. As an oversimplification, CSS transitions and animations today generally work because the browser is able to compute the values of the in-between states of an element.
If we want multiple DOM nodes to participate in the same animation, things become very tricky because the amount of computation required increases significantly. The proposed solution is to handle the complicated in-between state in a separate layer altogether with the help of pseudo-elements.
The visual transition is done using a static visual capture of the original state and a live capture of the new state, represented as a tree of pseudo-elements.
::view-transition
├─ ::view-transition-group(name)
│  └─ ::view-transition-image-pair(name)
│     ├─ ::view-transition-old(name)
│     └─ ::view-transition-new(name)
└─ …other groups…
It all starts with the startViewTransition() method, which returns a ViewTransition object when called. The state at this point is captured as the “old” state and rendering is paused.
The startViewTransition() takes a callback function as an argument, which is called asynchronously once the old state has been captured. Once the promise is fulfilled, the new state of the document is captured as the “new” state, and now we have the two states necessary for a smooth transition to happen.
What’s particularly interesting about how this feature is implemented is that “a failure to create a visual transition, which can happen due to misconfiguration or device constraints, will not prevent the developer’s UpdateCallback being called”.
As previously mentioned, the startViewTransition() method takes callback function as an argument, and this function will always be called even if the animation does not happen due to reasons. I think the idea is pretty smart, and highly suggest reading the specification because it’s a very readable explanation of the details.
View Transition API in action
These days, a common pattern we see on the web is data that gets populated after the page has loaded. It could be an user interaction that triggers a change in the content with new content that hadn’t existed in the DOM previously. We can animate such a content change using the View Transitions API.
For the example, we can build an image gallery, and have the scenario where clicking on a thumbnail will populate the main display with a larger version of the image.
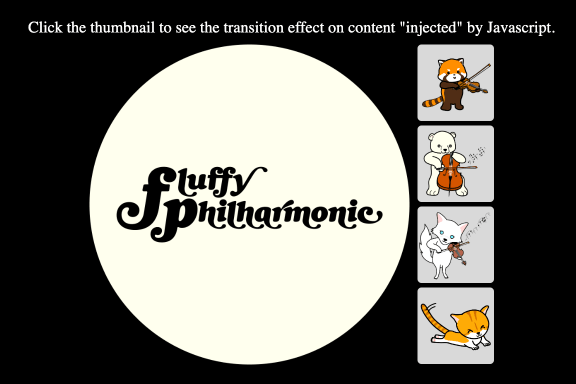
The basic markup for the display looks something like this:
<figure>
  <img class="main-image" src="https://i.imgur.com/40tbu6l.png" alt="Fluffy Philharmonic">
  <figcaption class="image-heading"></figcaption>
</figure>
Our list of thumbnails looks like this:
<ul class="thumbnails">
  <li>
    <a href="#">
      <img class="thumbnail" src="https://i.imgur.com/fr0t90i.png" alt="Viola">
    </a>
  </li>
  <li><a href="#">
      <img class="thumbnail" src="https://i.imgur.com/xreMn5b.png" alt="Mathia">
    </a>
  </li>
  <li>
    <a href="#">
      <img class="thumbnail" src="https://i.imgur.com/cQvn0un.png" alt="Arctica">
    </a>
  </li>
  <li>
    <a href="#">
      <img class="thumbnail" src="https://i.imgur.com/HnhJytt.png" alt="Taria">
    </a>
  </li>
</ul>
Let’s start off with our callback function (to be passed to the startViewTransition() method):
const mainImage = document.querySelector("figure img");

const displayNewImage = () => {
  mainImage.src = clickTarget.src;
};
Because this is just a demo, this function sets the main image source to the thumbnail that was clicked. In an ideal situation, we would have wanted to have optimised different images because of performance but let’s live with this for now.
As not every browser supports the View Transitions API at the moment, we do need to cater for it. The code for the View Transition looks like this:
if (!document.startViewTransition) {
  displayNewImage();
  return;
}

const transition = document.startViewTransition(() => displayNewImage());
The default ViewTransition is a cross-fade effect, where the old view animates from opacity: 1 to opacity: 0 and the new view animates in from opacity: 0 to opacity: 1. But the browser does this out-of-the-box as the default animation. If this effect is sufficient, no additional CSS is necessary.
See the Pen Default ViewTransition by Chen Hui Jing (@huijing) on CodePen.
For this most basic implementation, the entire page is involved in the transition. But we can also target specific elements to be animated separately from the rest of the page by assigning a view-transition-name to the element.
We can try something more than a simple cross-fade. Let’s make it seem as if the image is growing out from each respective thumbnail when the thumbnail is clicked on with the help of some additional CSS on the view transition pseudo-elements.
::view-transition-old(main-image),
::view-transition-new(main-image) {
  transform-origin: 100% var(--originY, 50%);
}

::view-transition-new(main-image) {
  animation: 400ms ease-out both grow;
}

figure {
  view-transition-name: main-image;
}

@keyframes grow {
  from {
    transform: scale(0);
  }
  to {
    transform: scale(1);
  }
}
We need to update the markup and Javascript a little update the transform-origin property value when the thumbnails are clicked. Let’s add a data-index attribute to each thumbnail which can be used to calculate the updated value so the main display image starts animating from the position of each thumbnail.
<ul class="thumbnails">
  <li>
    <a href="#">
      <img class="thumbnail" src="https://i.imgur.com/fr0t90i.png" alt="Viola" data-index="0">
    </a>
  </li>
  <li><a href="#">
      <img class="thumbnail" src="https://i.imgur.com/xreMn5b.png" alt="Mathia" data-index="1">
    </a>
  </li>
  <li>
    <a href="#">
      <img class="thumbnail" src="https://i.imgur.com/cQvn0un.png" alt="Arctica" data-index="2">
    </a>
  </li>
  <li>
    <a href="#">
      <img class="thumbnail" src="https://i.imgur.com/HnhJytt.png" alt="Taria" data-index="3">
    </a>
  </li>
</ul>
And update the Javascript to modify the --originY custom property value that controls the transform origin of the scale transformation along the y-axis.
const displayNewImage = () => {
  mainImage.src = clickTarget.src;
  document.documentElement.style.setProperty(
    "--originY",
    clickTarget.dataset.index * 25 + 12.5 + "%"
  );
};
The end result of all that looks like this:
See the Pen View Transition API (scale effect) by Chen Hui Jing (@huijing) on CodePen.
We can target other elements to be animated separately by giving them their own view-transition-name value. The view-transition-name can be anything at all but it needs to be unique and cannot be none, as that would result in no transition at all.
Maybe we want to have an image header to go with the main display. Again, for demo purposes, I’m just going to use the alt text from the thumbnail, but the content could come from somewhere else. The point is the content is changing. Let’s update the displayNewImage callback:
const displayNewImage = () => {
  mainImage.src = clickTarget.src;
  imageHeading.innerHTML = clickTarget.alt;
  document.documentElement.style.setProperty(
    "--originY",
    clickTarget.dataset.index * 25 + 12.5 + "%"
  );
};
The animation now is currently on the <figure> element, which contains the <figcaption> element where the text is displayed, so the scale effect will include the <figcaption>. But the View Transitions API allows us to separate the <figcaption> animation from the <figure>, and to me, that’s a huge plus.
Once a view-transition-name is assigned to the <figcaption> it will <figcaption> will now cross-fade when the <figure> scales. You can also customise the animation for the <figcaption> with CSS as well. So many possibilities.
See the Pen Image gallery animation with View Transitions by Chen Hui Jing (@huijing) on CodePen.
Can we use it today?
As it was put forth by the folks at Google, Chromium has had a working implementation of the View Transitions API since version 111. Both Firefox and Webkit are currently working their implementation of this feature, tracked in Bug 1823896 on Firefox Bugzilla and Bug 259055 on Webkit Bugzilla respectively.
Wrapping up
Hopefully this post manages to highlight the potential of View Transitions, and inspires you to explore more and give it a try yourself.