For people who may not be entirely familiar with the software development process, understand that it’s not like we start off with a fixed pool of issues which gets smaller as issues are resolved. For a relatively large project like Drupal, on-going development will inevitably introduce new issues. But if you take a look at the issue logs, the issues have been steadily trending downward since we started, and RC1 was finally released on October 7.
I first took a peek at Drupal 8 over a year ago when it was at alpha9 just out of curiosity. At that time in my career, I was barely getting the hang of Drupal 7, so I didn’t really explore very much beyond clicking around the interface and trying to create some content. With RC1 fresh out of the oven, and looking pretty good to me, I figured it’d be a good time to go through the process of building a Drupal 8 site and documenting the experience. Because, why not?
-
Download the required Drupal 8 files
There are two ways to do this. You can download the files from Drupal.org and extract them into your local development manually. My preferred method is via Drush. If you’re not using Drush, I highly suggest it. Instructions for getting up and running with Drush can be found here. Make sure you’re using at least version 7 as Drupal 8 doesn’t work with earlier versions of Drush.Navigate to wherever you store your local development sites and run the following:
drush dl drupal-8 --selectI suppose you could go for the dev version, but the latest supported version will be fine as well.
-
Run the install script
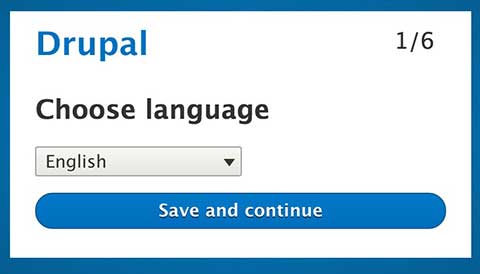
Navigate to the base url of your site and you should see something like this:
The entire process doesn’t deviate from Drupal 7 very much, and almost all the fields to be filled are exactly the same. It’s just a slightly different look and feel in terms of UI.
According to the official documentation, Drupal will create the
settings.phpandservices.ymlfiles during installation, but if it can’t, it will prompt you to do so manually. If you do get this prompt, it’s highly likely that your web server does not have permissions to write to thesites/defaultfolder. If you don’t feel likechown-ing anything, you can move on to the next three steps.Depending on how your local machine is set up, you’ll have to allow your web server to have write permissions to the sites/default folder. For my machine, I was using the default Apache that came with OS X, so I changed ownership of the folder to
_www, which was the default Apache user (modify accordingly if you’re using something different).If you’re using MAMP, you can follow the instructions from this article by ifmeister.
-
Adjust folder permissions for install
Drupal needs to modify thesettings.phpandservices.ymlfile during installation. It also needs to be able to create the files folder. Modify the permissions of the sites/default folder so Drupal can write to it:chmod a+w sites/defaultThis command changes the permissions on that folder to allow everyone to write to it.
-
Create the services.php and services.yml files Make a copy of the
default.services.ymland thedefault.settings.phpfile as follows (assuming you’re in the sites/default folder already):cp default.services.yml services.ymlcp default.settings.php settings.phpModify the permissions of the settings.php file so Drupal can write to it during the setup process.
```bash chmod a+w settings.php ``` -
Adjust file and folder permissions
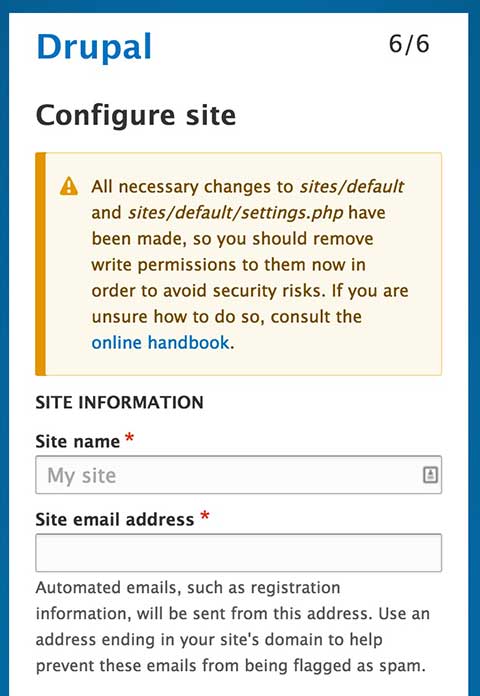
If you had to go through steps 3 and 4, then when the site is done installing, you’ll most likely get a warning message like so:
Resolve the issue by changing the permissions on those files back to a secure state:
chmod go-w sites/default/settings.phpchmod go-w sites/default -
Optional setup for local development
This is optional but it’s really good practice to do so. You can make a local settings.php file to distinguish server configurations and other settings between your local development environment and your production environment. Make a copy of thesettings.phpfile and name itsettings.local.php. On thesettings.phpfile, uncomment these lines and move them to the bottom of the file:# if (file_exists(**DIR** . '/settings.local.php')) { # include **DIR** . '/settings.local.php'; # }On the
settings.local.phppage, if your site is drupal8.dev, for example, set up your trusted host patterns.$settings['trusted_host_patterns'] = array( '^drupal8\.dev$', '^www\.drupal8\.dev$', '^localhost$', );
Your new Drupal 8 site should be ready for tinkering. Just double check everything is set up correctly by reviewing the Status report page. There shouldn't be any warnings or errors. If so, you gotta resolve them. The good part about using Drush to install Drupal 8 is that you can update Drupal with this handy command:
drush up drupalYou can also check for updates for all modules, including core, with this command:
drush pm-updatestatusIf you want to exclude a module from being updated, you can lock it with the following command:
drush pm-update --lock=MODULE_NAME --lock-message="LOCK_MESSAGE"I ran into some errors when I tried to running updates via Drush, and it was because my version of Drush was not updated. Not sure if this is only an issue for people on the latest dev version (8.0-dev) of Drush though. I had installed Drush using Composer so to resolve that issue I updated my version of Drush using the following command:
composer global updateI’m going to stop now before this turns into a post on using Drush, but for a comprehensive reference, you should check out the aptly named Drush Commands website. Have fun with Drupal 8!